The prospect of creating your own blog or website is both exciting and scary – we’ve been through it ourselves! Whether you’re looking to launch a business or want a space to share your personal thoughts, building your online platform doesn’t have to be tricky.
We’re going to break it down for you, step-by-step, exactly how to make a minimalist website, including the best minimalist themes and design tips, to make it as easy as possible:
 Domain name and Hosting
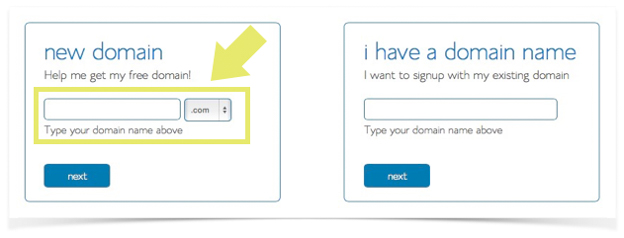
The domain name is the address that people will enter to view your site. Although it doesn’t have to be the same as your blog name, it’s a good idea to be consistent. We’re Scandinavia Standard and our domain is www.scandinaviastandard.com. Little-known fact: we originally envisioned this site as Scandinavian Standard, but the domain name wasn’t available and we had to change. Now, we can’t imagine it any other way.
Go to Bluehost to see if the domain you want is available. If so, snap it up! Those things go fast.
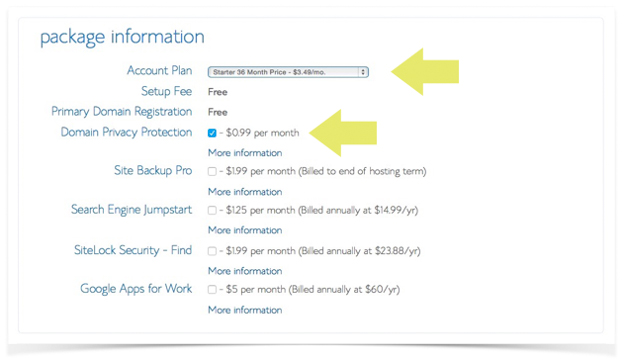
Their starter pack is inexpensive but be aware that you’ll have to pay in one lump sum for the year. It’s under $50 USD for their starter pack, which should be more than enough, even for those of you starting a business; remember you can always upgrade later.

Though you often have to buy your domain name, if you choose to host through Bluehost, you actually get the domain for free. We use Bluehost and it’s been fantastic – basically, they provide the actual space on the internet for us, kind of like our internet landlord.
On the next page, we chose the domain privacy plan that shields your personal address and phone number from being displayed to the public.
Your Site on WordPress
We use WordPress, which is why we’re recommending it to you. Once you’re registered your site with Bluehost, you can then install WordPress.
Here’s how to do it:
Login to Bluehost and you’ll be taken to an area called the “cPanel”, which is the navigation centre of Bluehost. There, you’ll find the “Website Builders” section. Simply click on the WordPress logo.
![]()
On the next page, click “Install” under the Do it Yourself Free section.

Insert your domain name, then click the “Check Domain” button.
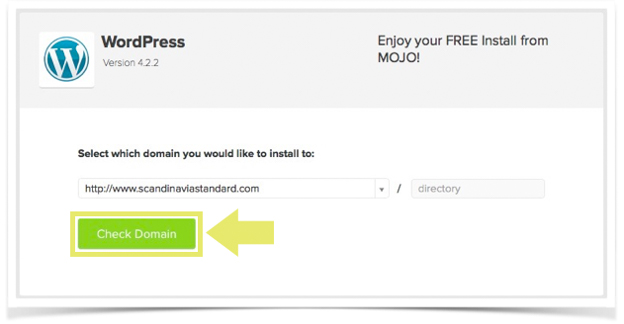
Check the terms and conditions box (after you’ve read them all. You do that, right?) then click the “Install Now” button.
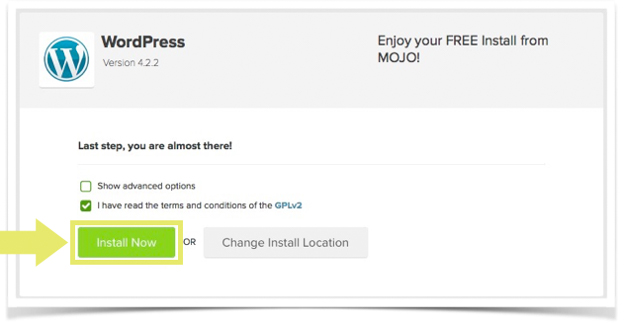
Voila!
You’ll receive a message that says “Your Install is Complete”. Congratulations! But before you reach for the champagne, it’s a good idea to click on “View Credentials” and jot down the URL details like Admin URL, Username, and Password. You can change these later but you’ll need them when you log in for the first time.
Once you’ve done that, type your Admin URL into your web browser. It will be something like “http://yourdomainname.com/wp-admin”. Enter the Username and Password you copied down in the previous step.
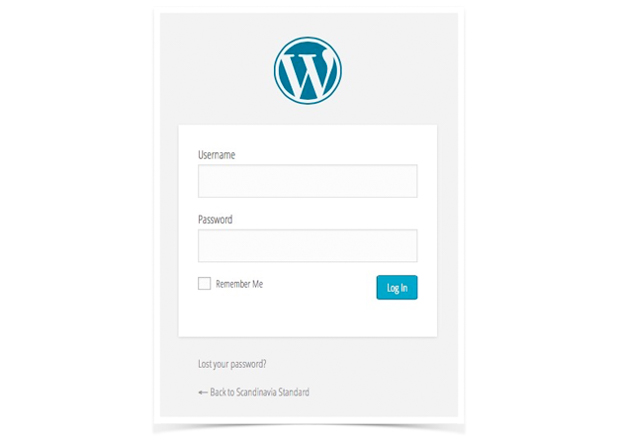
This is the page you will go to any time you want to edit or create a new blog post.
Welcome home!
A Minimalist, Scandi Look
Obviously not everyone wants a minimalist look for their website, but that’s what we’ve found has worked for us. If this is the aesthetic you want, you need to start with a theme:
Here are some of the best minimalist website options.
Remember that your theme needs to be responsive. This means that the theme will adapt to different browser sizes. Specifically, if a reader is using mobile or tablet to read your site, it automatically fit the screen. When you’re selecting a theme, it will say in the description if it’s responsive – and luckily most themes are these days.
You can also choose a premium theme. Here are a few that are a good fit for a sleek look:
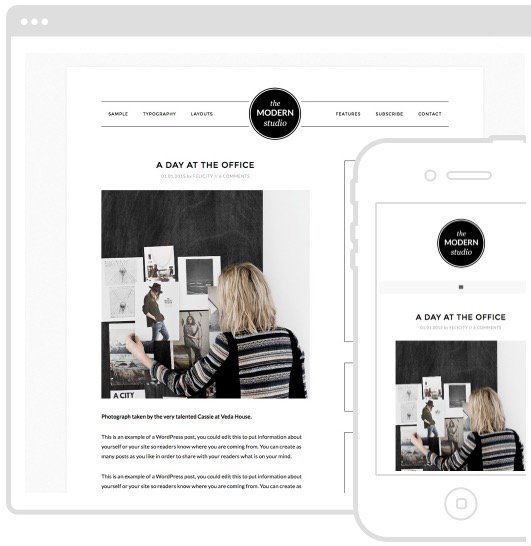
→ Modern Studio Pro Theme
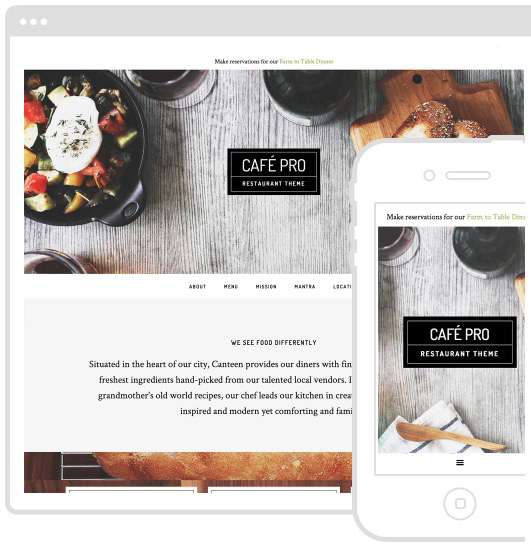
→ Café Pro Theme
Design guidelines:
When you’re going for that monochrome, sparse aesthetic, there are a few things to keep in mind:
1. Simple logo
There’s nothing wrong with color, of course, but a stark and simple logo goes a long way. It looks professional, well-made and will make you instantly recognizable. Your logo should evoke the feeling that the rest of your content will strive to underline.
→ Elin Kling
![]()
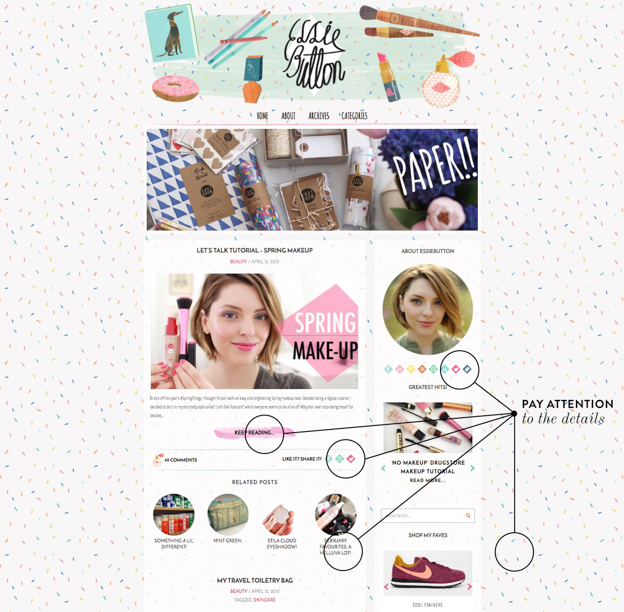
2. Pay Attention To Details
What colors do you want to focus on? How many posts should appear on your landing page? Is it important to have a sidebar? Although consistency is key, especially if you’re creating a business, it’s essential to be flexible and understand that your site will grow & change with you – these decisions are necessary but not final.
→ Essie Button
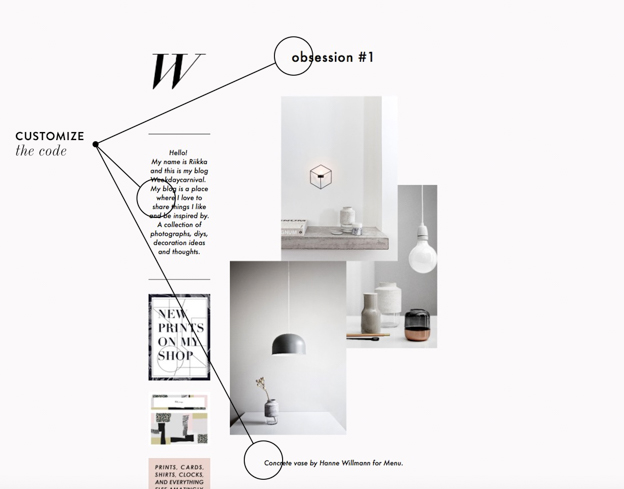
3. Customize the CSS Code
Play around with fonts and figure out what you’d like to use for headlines, sub-headlines, text and more. See what they look like bold, italic and in CAPITAL LETTERS. Contrasting fonts can make for very eye catching pages!
→ Weekday Carnival
Expert tip: keep a folder of Website Design Inspiration. We regularly clip our favorites and keep them in an Evernote folder.
Need some help creating your website? Our Creative Director, Freya, designed this website and also works as a freelance designer. Reach out for a quote by emailing her at [email protected]
More Resources
If you’re creating a blog or website for business purposes, then you’ve got your work cut out for you. We hope to make the process a little easier for you by sharing the information we’ve learned along the way:
- A guide for branding & the Business Model Canvas, including branding template.
- The process for starting a business in Copenhagen.
- Affordable & beautiful business cards.
We’ve also been lucky enough to work with many inspiring entrepreneurs since our launch. Here are a few articles to get you inspired:
- Fashion designer Ambra Fiorenza
- Copenhagen cafe Slice of San Francisco
- Graphic design company ViSSE VASSE
If you use this handy guide to start your blog, share it with us in the comments! We’d love to see your work!
Heads up! This post contains affiliate links. Don’t worry, the commission we make comes at no additional cost to you. For more information on our affiliate program, please see our Disclosure Policy.